




While many features on your Pixel phone, exclusive or not, are enabled by default, a good chunk aren’t. Worse still, some handy features are not only disabled by default but also buried under a deluge of menus and rarely mentioned in Pixel promo materials, in true Google fashion.
I wish someone had shown me how to enable the features listed below on day one of owning my Pixel 10 Pro, but at least now I can show you how to enable them so you don’t overlook them as I did.
Brand
SoC
Google Tensor G5
Looking to upgrade to a Pixel but not sure if you need all the bells and whistles of the more expensive models? You won’t be disappointed with the standard Pixel 10 model. Coming in striking colors, Gemini features, and seven years of updates, you can’t go wrong with this purchase.
Quick Tap
Open apps and perform actions by tapping the back of your Pixel
I love Quick Tap, but I didn’t know about it for months until I came across a random Reddit comment mentioning it. After I found out about it and (finally) enabled it, it quickly became one of the most useful (and most-used) features on my Pixel.
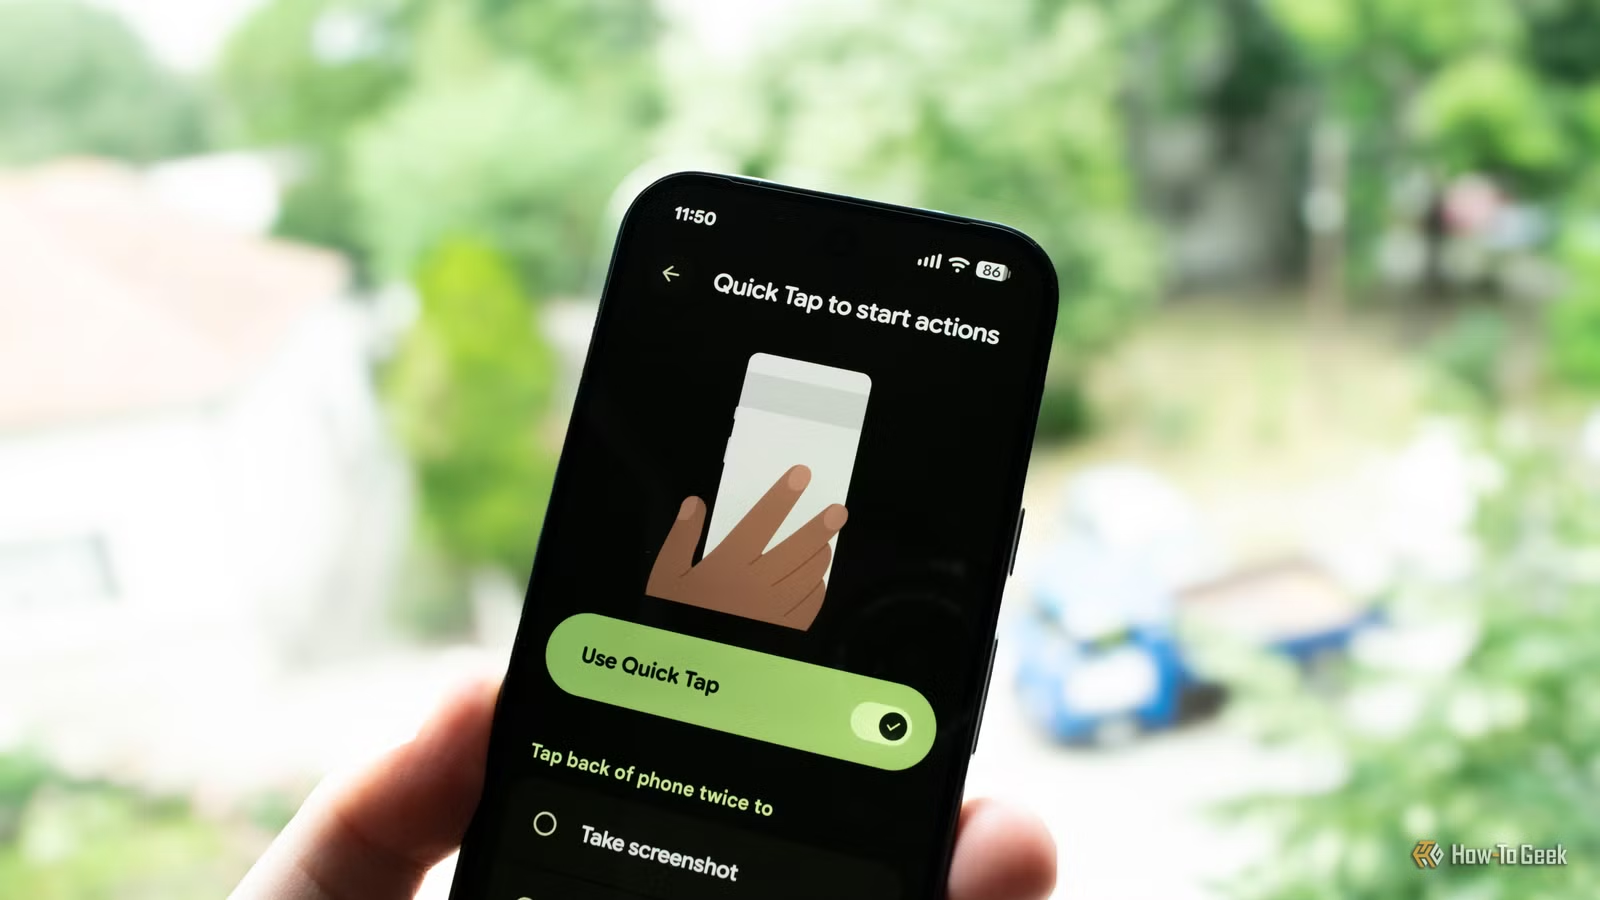
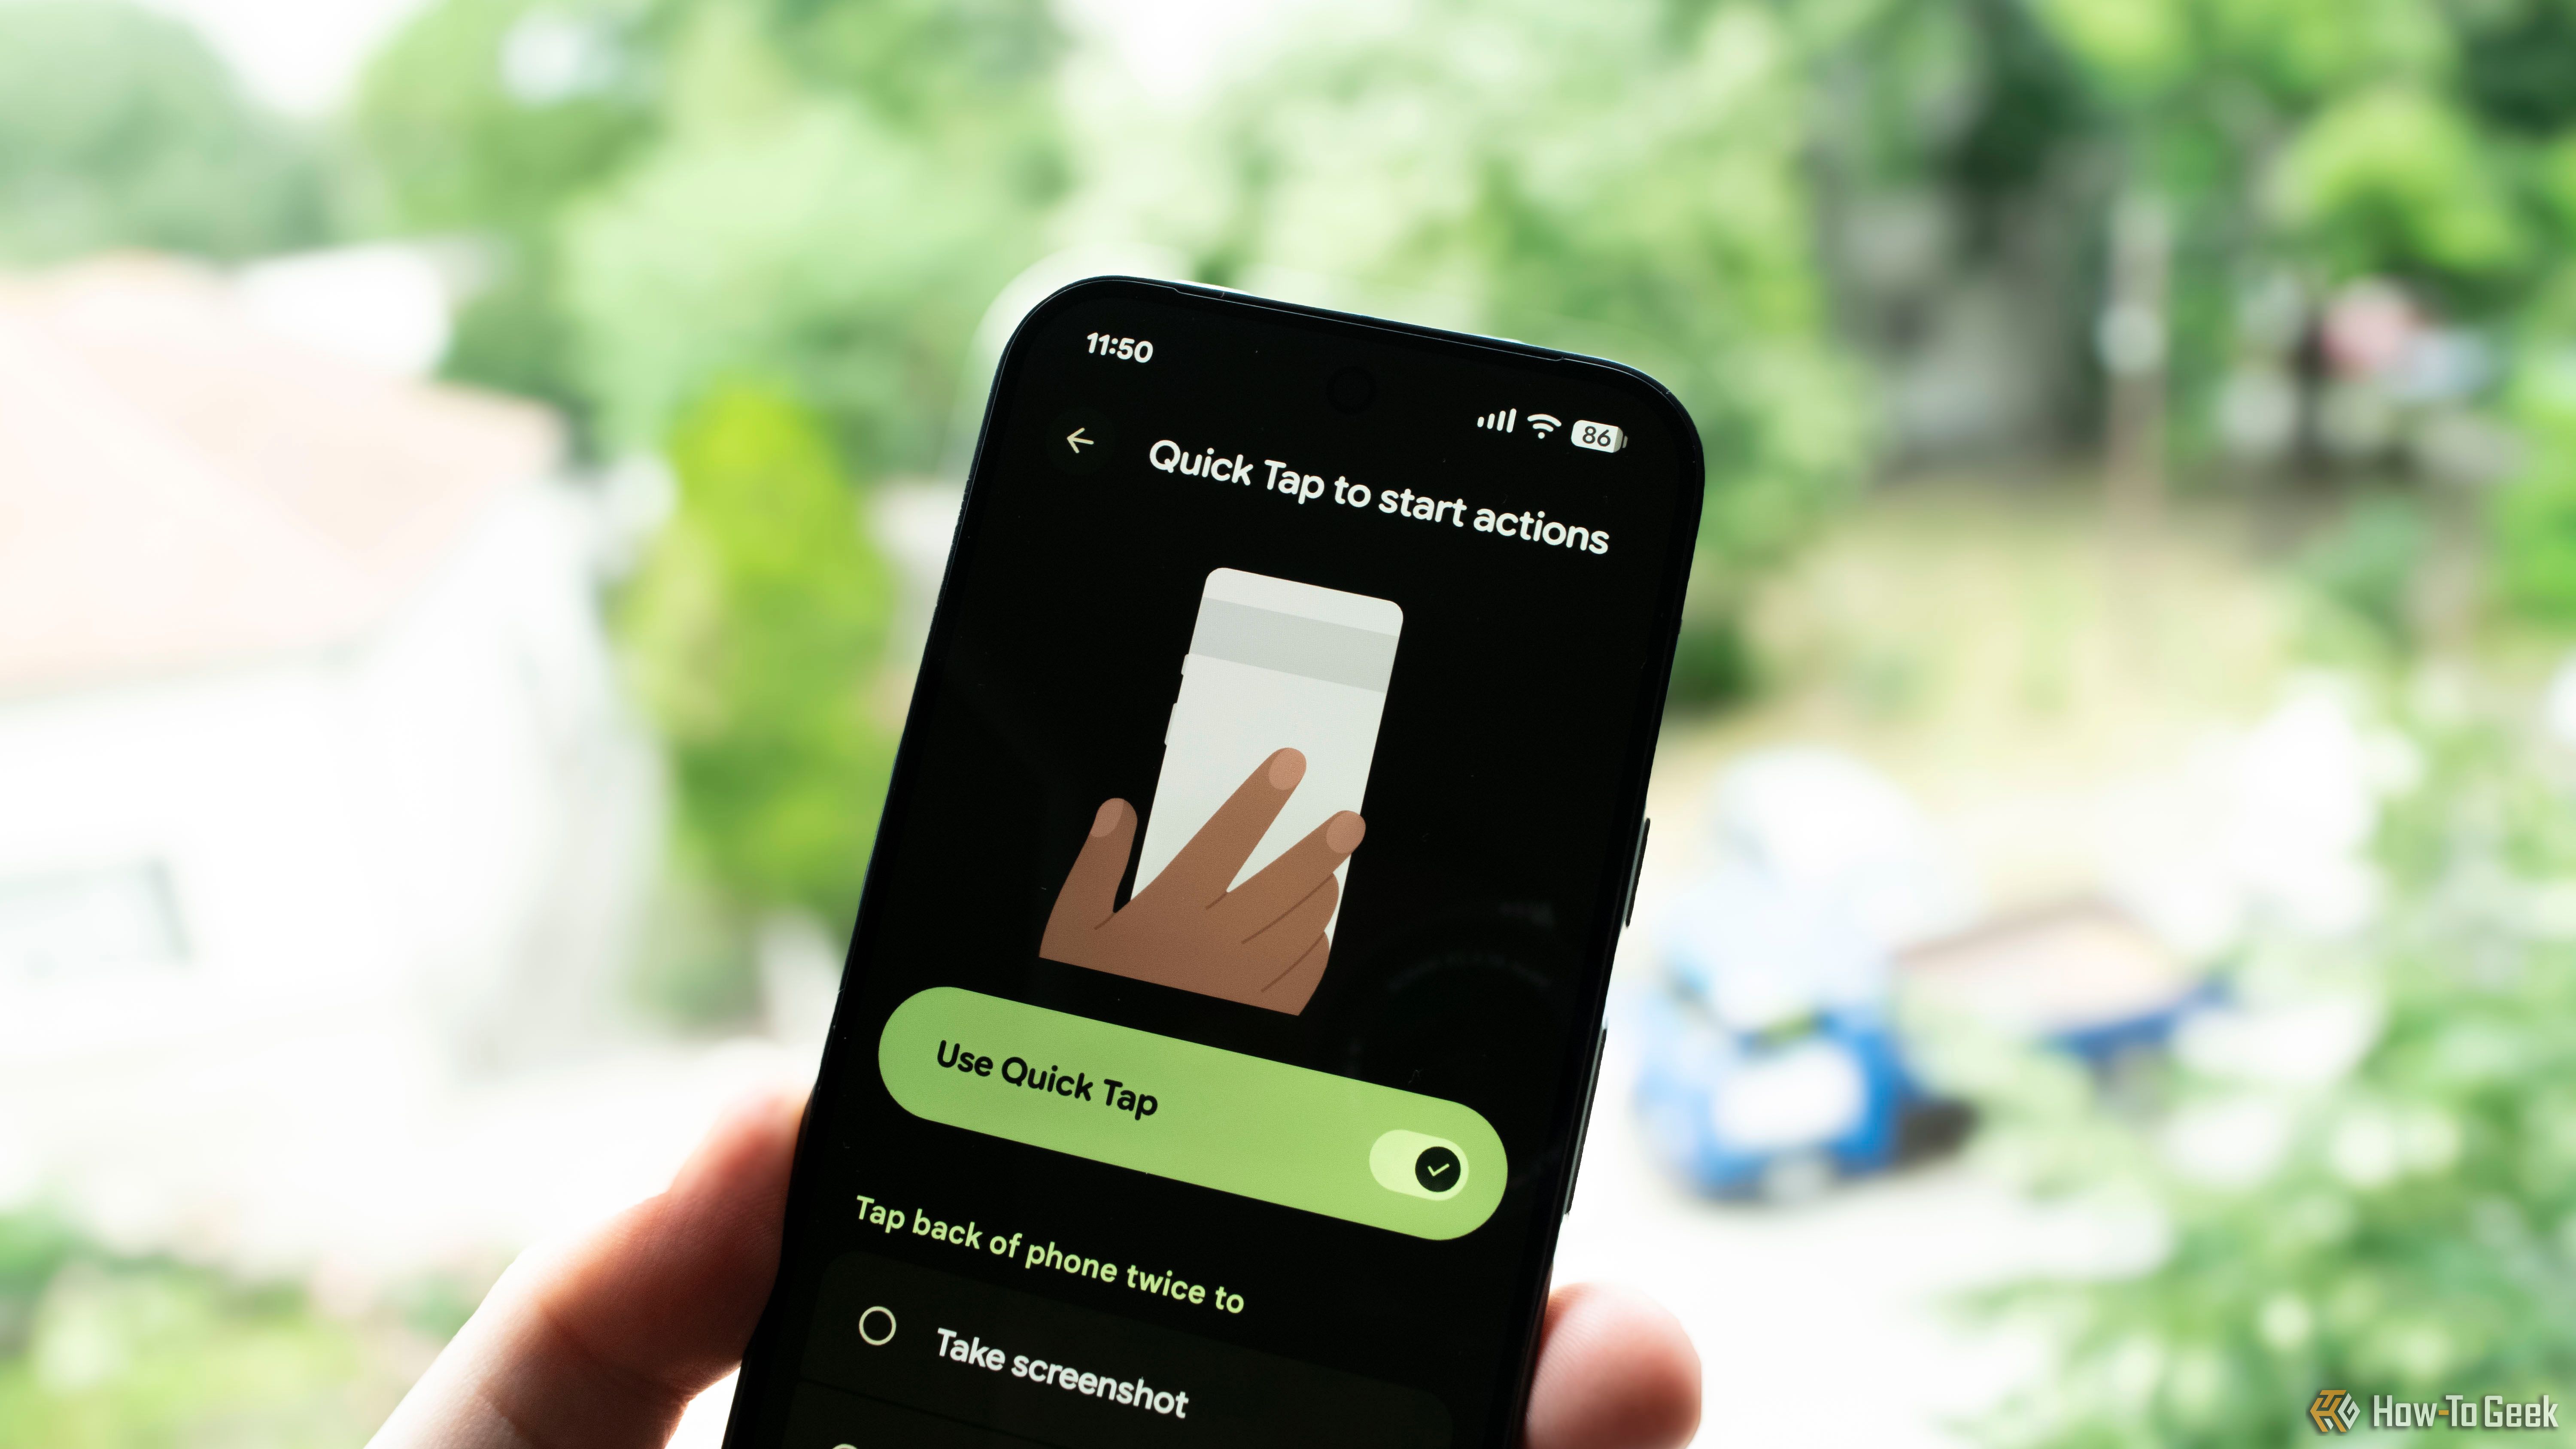
In a nutshell, Quick Tap allows you to open any app on your phone and perform various actions by quickly tapping the back of your phone twice. You can even open specific menus in certain apps with the gesture, such as landing directly on the Wall of the Day screen in Backdrops or going straight to the Wi-Fi settings menu. I use it to open my bank’s wallet app and take screenshots for articles like this one.
To enable Quick Tap, open Settings and then go to System > Gestures > Quick Tap to start actions. I recommend tapping anywhere on the lower third of the back of your phone instead of the spot shown in the instructional animation (located around the Google logo), because the default tap location is a bit unreliable.
Comfort View
No more eye strain
Comfort View is another feature I use every day. It’s a screen filter that desaturates on-screen colors, giving them a pastel-like look that’s easy on the eyes.
I usually activate it in the morning, if it isn’t already on, and keep it enabled throughout the day unless I’m taking or looking at photos or watching videos. It reduces eye strain from staring at my Pixel’s screen and works especially well at night when paired with Night Light (Google’s blue light filter). The catch is that Comfort View arrived with the March Pixel Drop, so it kind of flew under the radar for many Pixel owners, which is a shame because it’s very handy, especially if you, like me, suffer from dry eyes.
You can enable it by going to Settings > Display & touch > Comfort Filters. If your eyes get strained easily, disable Dynamic Adjustment and push the intensity slider all the way to the right. I also recommend enabling the increased 480Hz display flicker rate (Settings > Accessibility > Adjust brightness for sensitive eyes), which can further reduce eye strain, especially if your eyes tire easily when looking at OLED displays.
Live Caption
Your Pixel can generate live captions for any video
Live Caption does pretty much what it says, offering live captions for videos playing on your Pixel if captions aren’t already enabled. So, for instance, if you’re watching YouTube with captions enabled, it will stay out of the way, but it will immediately kick in the moment you play a video without captions.
I use it when doomscrolling Reddit because I keep videos muted, and this way I can find out what’s happening without having to turn up the volume. It’s super handy when you’re doomscrolling in bed while your partner is sleeping.
You can activate Live Caption by opening Settings > Accessibility > Live Caption. Now, I don’t recommend enabling it outright because it will kick in whenever you play a captionless video that contains speech. Instead, enable the Live Caption in volume control toggle to add a Live Caption button to the volume controls. Then, just press a volume button and turn it on when needed.
Auto Best Take
Auto Best Take is a fantastic feature if you often take photos of people. It works together with Top Shot to capture multiple shots and then combine the best expressions from them into a single image.
Naturally, Google has buried the setting under multiple menu screens, so activating it is not as simple as it should be. First, open the Camera app and tap the gear icon in the bottom-left corner. While you’re there, make sure Top Shot is set to Auto because it’s required for Auto Best Take to work. Next, open the three-dot menu, where you can enable the Auto Best Take toggle.
Adaptive vibration
Never miss a notification when your phone is set to vibrate
Adaptive Vibration is a simple feature that increases vibration intensity in situations where there’s a higher chance you won’t notice your phone vibrating at its default intensity: when it’s in your pocket or a bag, when there’s music playing around you, and so on. It can be a game-changer if you keep your phone on vibrate often, as I do.
You can enable it by opening Settings and then going to Sound & vibration > Vibration & haptics > Adaptive Vibration. While you’re there, I also recommend enabling the gradual ring setting, which makes your phone vibrate first when receiving a call and then gradually increase the ringtone volume until you answer it.
Brand
SoC
Google Tensor G5
The Pixel 10 Pro offers an upgrade over the base model with the powerful Google Tensor G5 chip, more RAM, and more storage (if you need it).
Google jam-packed Pixels with cool features, but many are hard to find and activate
There’s no denying that Google has introduced a deluge of genuinely useful features to its Pixel phones over the years, but the fact of the matter is that many aren’t talked about enough, are disabled by default, and require you to go out of your way to enable them.
Even after more than three months of owning my first Pixel phone, I’m still discovering new features, and I’m positive my journey of discovery will continue, especially now that Android 17 is just around the corner.


