

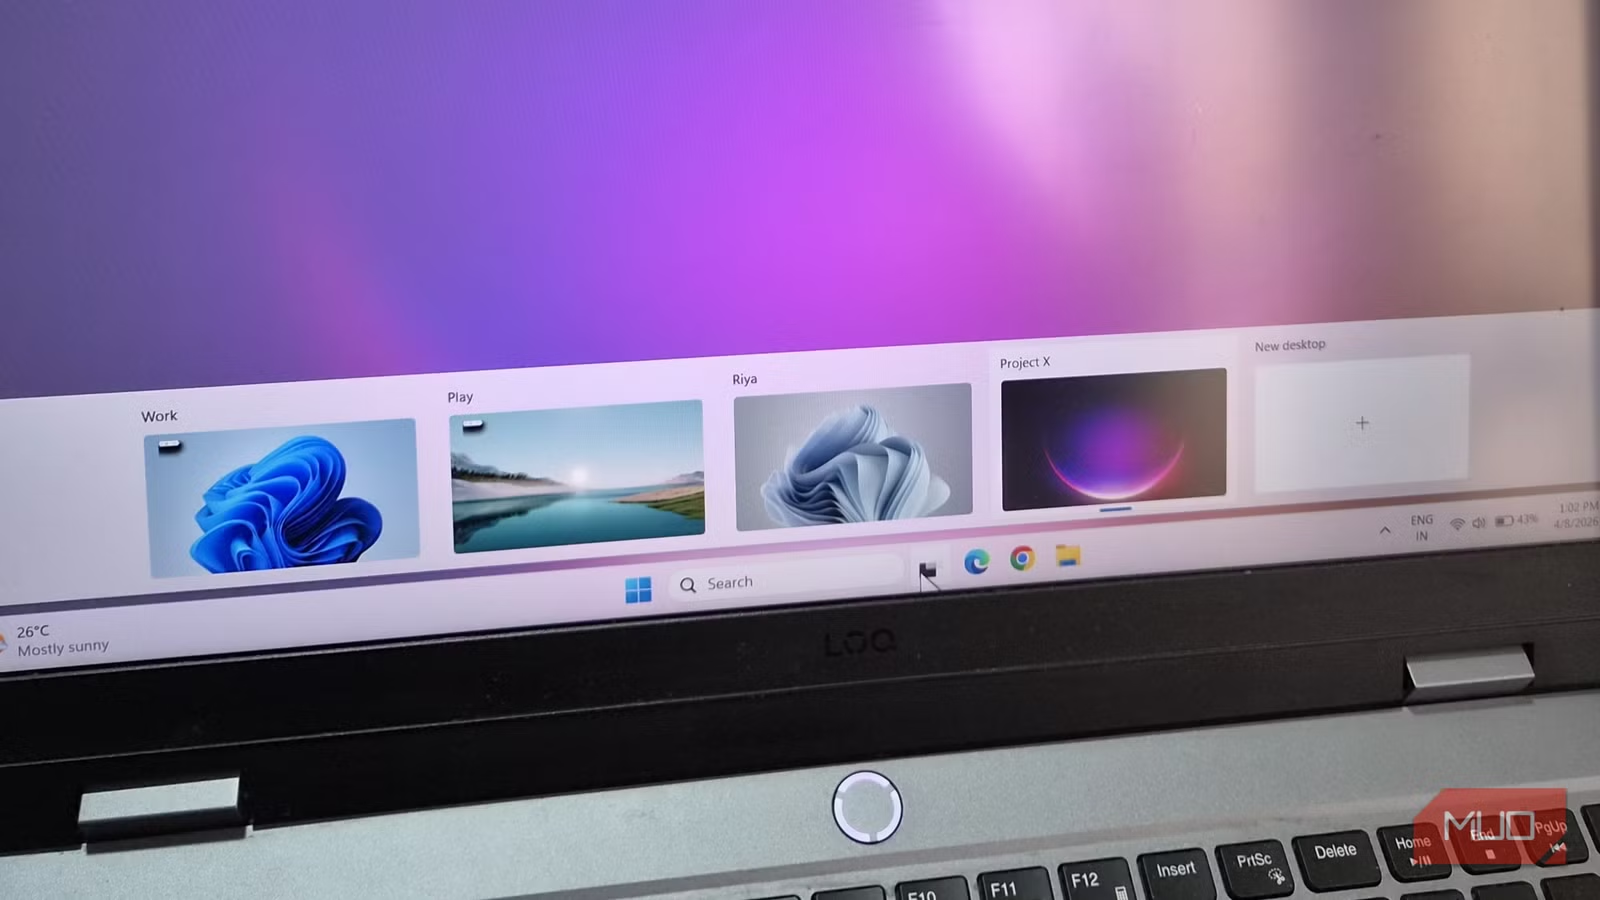

Windows is full of useful productivity features, but like most people, I don’t use every one of them. But if there’s one feature I regret ignoring for too long, it’s virtual desktops. I always assumed it was not worth the effort, but once I tried it, it turned out to be the complete opposite.
Virtual desktops solve a problem most of us face, which is having too many apps and windows open at the same time. It makes your desktop look cluttered, and switching between tasks feels more frustrating than productive. With virtual desktops, you can separate apps and windows into different spaces, so everything feels organized and easier to manage.
What virtual desktop actually does
Multiple desktops in one
Screenshot by Digvijay Kumar – No attribution is required
Virtual desktops on Windows are like having multiple PCs on the same hardware. Instead of getting lost between dozens of apps open on a single screen, you can spread them across different desktops.
One desktop can be for all work-related things, another for personal stuff, and one more for fun things like social media and chatting with friends. This way, you can switch to the desktop you need and only see the apps relevant to that task. It’s the perfect alternative to setting up multiple monitors.
Getting started with virtual desktop
It’s easier than you think
Creating a virtual desktop is as easy as it gets. Click the task view icon on the taskbar (the one that looks like two overlapping squares) and choose New desktop. You’ll see an empty desktop with no apps and windows. Anything you open here will only appear on this specific desktop.
If you don’t see the task view icon, head to taskbar settings, and enable Task view under taskbar items.
By default, Windows will name these Desktop 1, Desktop 2, Desktop 3, and so on. But you can rename these so you know exactly what the desktop is for. Click the task view icon, right-click on a desktop, and choose Rename. Give it any name you want, like Work, Personal, Study, Fun, or something specific like Project X.
Another way to differentiate your desktops is by setting a unique wallpaper for each. This way, you can instantly recognize which desktop you’re on. In task view, right-click on the desktop and click Choose background. This will take you to the Settings app, where you can pick the wallpaper as usual.
Once you’ve created your virtual desktops, you’re free to arrange them however you like. It’s as simple as clicking and dragging desktops in task view.
Customize virtual desktops to fit your flow
You’re in control
Screenshot by Pankil Shah — No attribution required
Virtual desktops are all about separating your apps and files, but Windows does give you a few options so you can make them behave your way.
Head to Settings > System > Multitasking and click on Desktop. You’ll see a couple of options here. The first one forces Windows to show all your open apps from all desktops on the taskbar. This is handy if you need to switch between desktops often and want everything visible at a glance. Personally, I prefer the default way because showing all open windows on the taskbar makes it feel cluttered.
The second option is similar, but for Alt + Tab. It lets Windows to show all open windows from all desktops when switching apps. Again, I think the default way is much better, as seeing a dozen apps when pressing Alt + Tab defeats the purpose of separating them in the first place. But if that’s something you want, you can use this option.
Finally, Windows also lets you customize behavior for specific windows. In task view, right-click on any window, and you should see the option to move it to a different desktop. The Show on all desktop option makes that specific window visible everywhere. This is perfect for your music player, chat app, or anything you want constant access to.
Then there is the Show windows from this app on all desktop. This one lets Windows show every window from that app across all desktops.
Related
This Free App Changed How I Navigate My Desktop
My desktop feels way smarter now.
It’s way more fun with keyboard shortcuts
Skip the clicks
Screenshot by Pankil Shah — No attribution required
The task view icon makes it fairly simple to manage virtual desktops. But if you want to do everything slightly faster, keyboard shortcuts can make a huge difference.
Shortcut
Use
Win + Ctrl + D
Create a new virtual desktop
Win + Tab
Show Task View with apps and virtual desktops
Win + Ctrl + Left/right arrow
Switch to next or previous desktop
Win + Ctrl + F4
Close the current desktop
Alt + Shift + Left/right arrow
Move the current desktop left or right
If you are using a laptop, you can also take advantage of touchpad gestures. Swiping up with four fingers will open the task view. You can even swipe left or right with four fingers to switch between desktops. Diving into Windows’ touchpad settings lets you set up gestures for creating and removing a desktop too.
I went from completely ignoring virtual desktops to using them every single day. And I feel it’s a godsend for anyone working with a single screen. You can keep things simple with just two desktops or go all in and create separate spaces for every part of your day. It’s all about how you want to work.
